So, I've spent some time the last few posts talking about VMWare View – and how we use it at LifeChurch.tv for our testing environments.
Part 1 – I talked about installation
Part 2 – I talked about configuration
Part 3 – I talked about how to actually use VMView
Let's talk about a few "gotchas" I ran into – maybe they will help you along the way – whether in testing or in full production.
Quick Prep – Join the Domain
I had a hard time getting my new "quick prepped" machines to join our domain. I verified our administrative username, and it was right. In the middle of troubleshooting, I was SURE I read somewhere that you did not have to join your "gold master" VM to the domain. I was SURE you could just have a "workgroup" GM and then use quick prep settings to join it. The thing is… it didn't work… I tried for hours, with both XP and Vista and various flavors including using the REAL "administrator" account for our domain (which is, of course, renamed). Nothing.
Then I decided to RTFM. Sure enough, in the VMView Manager Admin Guide, Page 106, they are explicit – you've got to join the domain in your "Parent VM" or "Gold Master" as I've been referring to it…
Yup there ya go. I guess I should have read all 182 pages of the Admin Guide, eh? 🙂
Quick Prep – Place VMs in Proper Active Directory OU
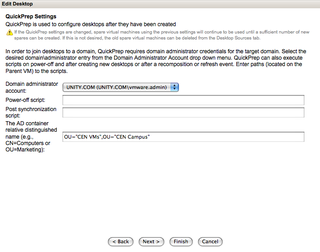
Another weird issue I had at first was placing the VMs in the proper AD container. When setting up my Pools inside VMView Manager, the default AD (LDAP) location is CN=Computers. I wanted to place mine in my "CEN Campus" OU. Actually, I wanted to place mine in my "CEN VMs" OU which is a child OU of the "CEN Campus" OU which is a child of my AD domain – unity.com.
The CN= thing is what confused me. I tried CN="CEN Campus",CN="CEN VMs" – no worky. I tried "CN=CEN VMs","CN=CEN Campus" – no worky. I tried all sorts of combinations until I remembered, like an idiot, that CN isn't what I wanted. I wanted OU= and that worked. My final setup there was:
OU="CEN VMs",OU="CEN Campus" – notice I didn't have to do the DC= stuff for my domain. It looks like this:
Using "real" SSL – not the self-signed SSL cert
This one was the last real "issue" we had for our install. Sure, it's nice to have a self-signed cert. But, if we're going to do this for realsies, we should use a real cert. I use Rapid SSL for my SSL certs. I like them because they are cheap – and I haven't needed an intermediate cert yet.
I was given the warning – "Don't mess with the SSL stuff – it's a PITA – and it will just suck your life away" – and I chose to ignore that warning. That's my style. After hours and hours and hours, I realized they were right. But, I had hope. I found THIS post – and it was great. Let's walk through what needed to be done.
On your VCS (Management) machine, drop to the command prompt. Oh yes, this is ALL command prompt driven – no GUI for you.
Navigate to the C:Program FilesVMwareVMware ViewServerjrebin directory (Herein referred to as PATH). You're going to run some commands here.
The first thing you're going to do is create the keystore:
- PATH>keytool -genkey -keyalg "RSA" -keystore keys.p12 -storetype pkcs12 -validity 360
Great. Now you need to create a certificate request
- PATH>keytool -certreq -keyalg "RSA" -file certificate.csr -keystore keys.p12 -storetype pkcs12 -storepass password
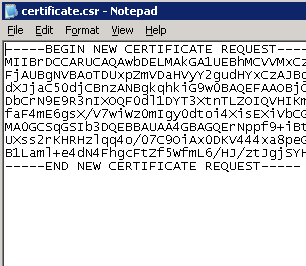
You would have been prompted for a password during the keystore creation. Use that password when creating the certificate request. Cool, so you've now created the Certificate request and it's saved in the "certificate.csr" file in your PATH folder (remember, that's the C:Program Files… blah blah folder)
Your csr will look like this…
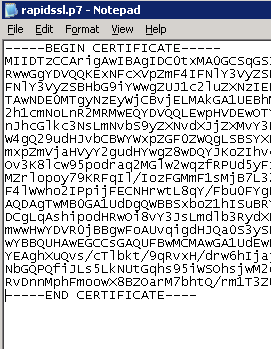
Now, take that CSR and get yourself an SSL cert. This will vary in flavors and forms, and remember, I use Rapid SSL. Basically, at the end of the day, you'll have a certificate in one of many forms. Open on of those up in notepad or some other text editor, or, if you're given your "cert" via web browser, just copy/paste that into notepad or some other text editor. Now, SAVE that file to a raw text file with the .p7 extension. I saved mine as "rapidssl.p7" and placed that file in the PATH directory from above. My .p7 file looks like this.
Great. Now what? You've got your certificate. It's in .p7 form. What do you DO with it? Now, you have to make sure the VMView Webserver can use it. Back to the command line
- PATH>keytool -import -keystore keys.p12 -storetype pkcs12 -storepass password -keyalg "RSA" -trustcacerts -file rapidssl.p7
Remember, "password" is the password from above, and rapidssl.p7 is the name you saved your cert as above.
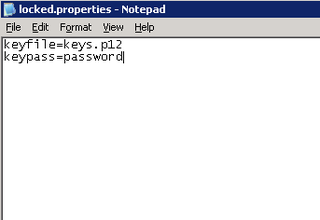
Now, you need to copy the certificate store (named keys.p12) FROM the "PATH" directory TO the C:Program FilesVMwareVMware ViewServersslgatewayconf folder. Then, you need to create a locked.properties file, and you need to place that file in the same "sslgatewayconf" folder. Your locked.properties file can be created in notepad or any other text editor and it will look like this
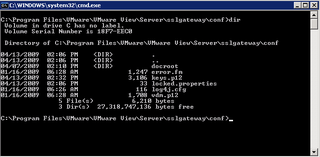
Hooray! Now, verify that your "sslgatewayconf" directory has the keys.p12 and the locked.properties file in it. Let's look at that.
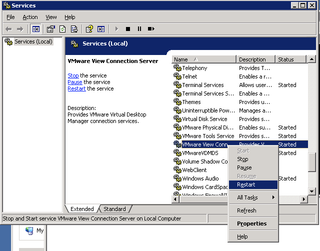
Great. They are there. All that's left is restarting the VMWare Connection Server. You do this by simply bringing up your Services applet and, well, restarting it.
That's it! You're done.
You just:
- Created a keystore
- Created an SSL CSR
- Generated a Certificate using that CSR (bought it or used your internal CA)
- Saved that Cert as a .p7 file
- Imported the .p7 to the keystore
- Copied the keystore to the right "conf" directory
- Created the "locked.properties" file and put it in the right directory
- Restarted the Services
Now, next time you access your VCS via HTTPS, you won't get the annoying SSL "self signed" warning. You'll get a happy web browser accessing your VMView environment, over HTTPS, using your real SSL cert. Good for you.
I hope this series was helpful to you. Please drop me a comment if it was.

Thank you sir!!!
Your directions and link to vmware really helped!
This is really good THANK you!
Hey jjgunn & Gene–
Thanks for the comments. The “tips and tricks” or “gotchas” are one thing I miss when I find other random blogs. I don’t necessarily have the MOST useful information – but – when I run into a problem, I do my very best to document it for those that come after me. I always like to help!
–DW
Hi,
I am currently a student who doing my final year project on a virtualised network using VMWare View.
I thank you for your informative articles, and now know more about VMWare View, however, I am still not clear on what is contained in the underlying infrastructure.
Is it possible to provide a logical network diagram, and the different servers required in the VMWare View network?
Thanks
Hi luqman–
The best place to get what you want is from the VMWare website. If you’re looking for details re: the different servers / underlying infrastructure for VMView – go here:
http://www.vmware.com/products/view/features.html
Thanks,
–DW
Is this the same process for view 4.5? I have followed your instructions but when I restart the service the web page is no longer accessible.
Michelle–
I honestly don’t know. I haven’t played with View 4.5 before. This project was for View 3.x and since then the product has been sidelined.
Sorry.
–DW