Hello friends! I’m back today with an update to a previous post. A few months ago I wrote what has turned out to be a very popular post on Bookable Desks in Microsoft Teams. This provides the ability to either reserve, or, utilize a Shared Space – on demand – and have your Exchange Calendar update and your Teams Presence update (using Places) simply by plugging in a USB or HDMI cable! You can read more and get started here: Setting up Bookable Desks in Microsoft Teams – Microsoft Teams | Microsoft Learn and my last post on the subject walked you through it step by step.
Today I’m sharing a super cool update that wasn’t part of the original Bookable Desk solution at GA – Automatic Work Location! We shipped this last month – September 2024. If properly configured, when you plug in to peripherals at a bookable desk, with admin and your permission, your work location will be automatically set to ‘In the office’. Sharing your work location makes it easier to connect and coordinate with co-workers who are in the office. Learn more about Teams bookable desks.
Let’s walk through this new update together building on our last post.
Teams Configuration
Go read my last post linked at the top of this article. Then come back. I’ll wait. Great. Now, let’s focus on this new “Step 5” in Bookable Desks setup.

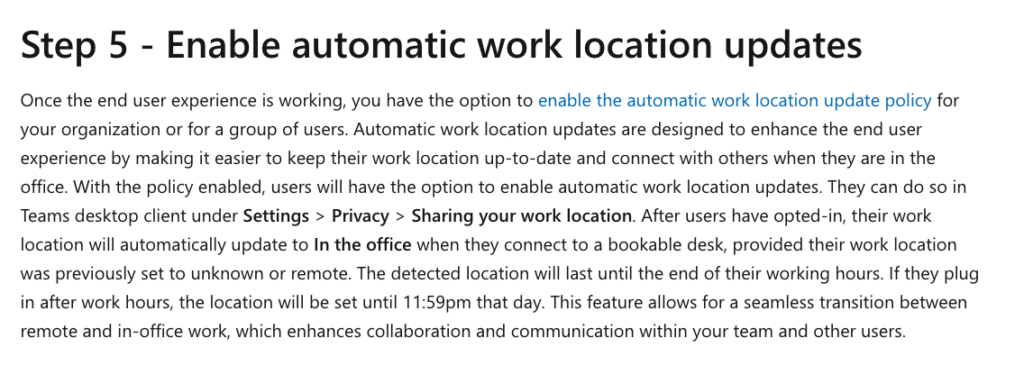
The link shared in Step 5 is here and it’s a new PowerShell command. For our purposes, I want to enable this automatic work location detection for all my users – so – I’ll update the global policy.

As a quick review, my Bookable Desk – Crestwood Office – is already properly configured in Pro Management Portal and has a few different monitors already setup as peripherals. I walked through this step by step last post, so, I’m just reminding you this is done here.

End User Experience
Just like last time, I want you to see the end-user experience. Let’s start by logging into Teams as our good friend Patti. Once we’re logged into Teams, let’s review Step 5.

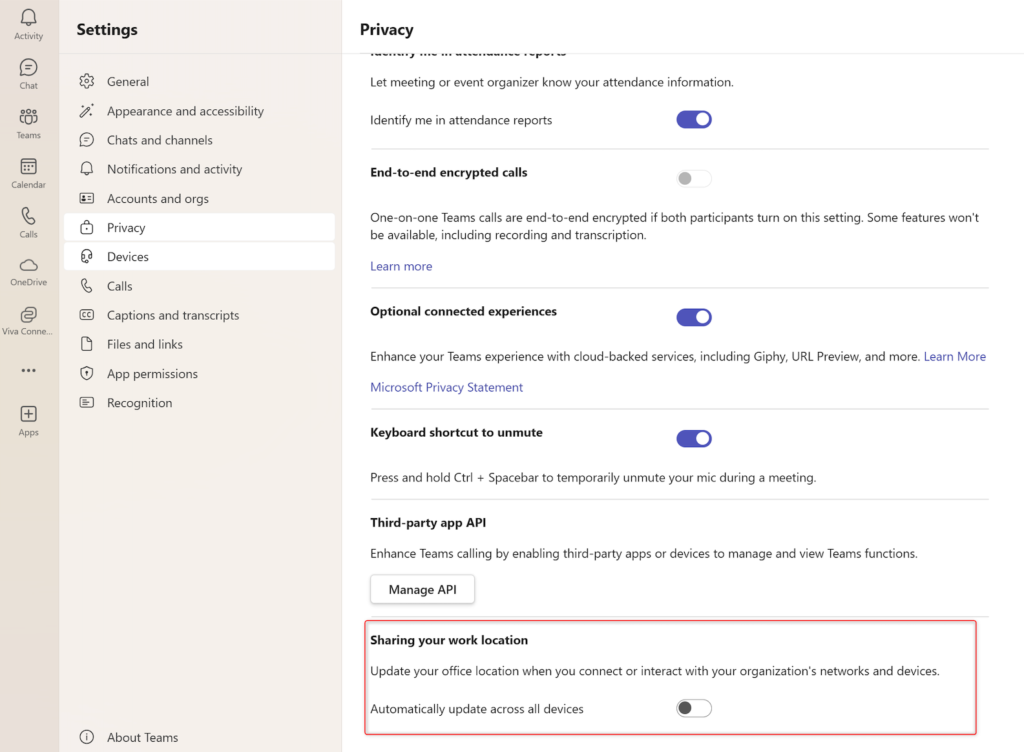
We’ll need to adjust Patti’s Teams Settings to enable this. Let’s head to Settings -> Privacy.

I need to enable Sharing your work location. Move that slider.

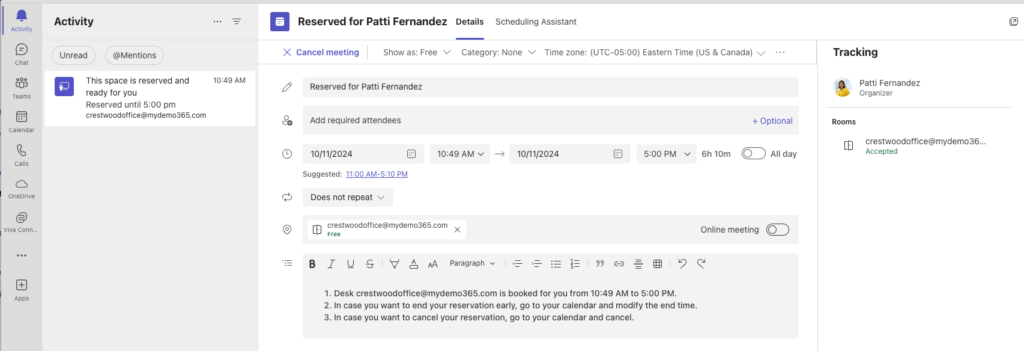
Great. Now. Let’s plug into the Dell Monitor that’s part of this Bookable Desk and see what happens.

A few seconds later, I get an Activity notification! Let’s click on that!

Perfect! It reserved my space, but, did the new setting take effect? Let’s click Patti’s avatar in the top-right corner of the Teams Client.

Yes! See that it shows “In the office” above! This all worked as designed! Because I’m plugged into a known Bookable Desk, and because I’ve both set the client policy, and the Teams policy, Teams knows I’m in the office.
Let’s Wrap This Up
Short and sweet today, just an update on a great new option in Teams – Bookable Desks!Just in case you’d like the “one spot” to go, here are the articles mentioned in both the previous and this blog article.
- Setting up Bookable Desks in Microsoft Teams – Microsoft Teams | Microsoft Learn
- How to create and book a workspace – Exchange | Microsoft Learn
- Set-Place (ExchangePowerShell) | Microsoft Learn
- Add peripherals to inventory – Microsoft Teams | Microsoft Learn
What do you think? Bookable Desks is a great way to either reserve, or use – on-demand – a configured space simply by plugging in. It’s all connected via Teams, Exchange, and other M365 services in the background. I can see some great future usage and reporting of this to help customers!
