Hi friends! Welcome back! This is my first post for Microsoft Fiscal Year 2025. I thought I’d start FY25 off with a bang and write about a new Microsoft Teams feature I’m pretty stoked about called Bookable Desks. This provides the ability to either reserve, or, utilize a Shared Space – on demand – and have your Exchange Calendar update and your Teams Presence update (using Places) simply by plugging in a USB or HDMI cable! You can read more and get started here: Setting up Bookable Desks in Microsoft Teams – Microsoft Teams | Microsoft Learn and as always, I’ll walk you through how I set it up for me 🙂
Step 1 – Verify the prerequisites are met
Yes, of course, there are a few things you need ahead of time:
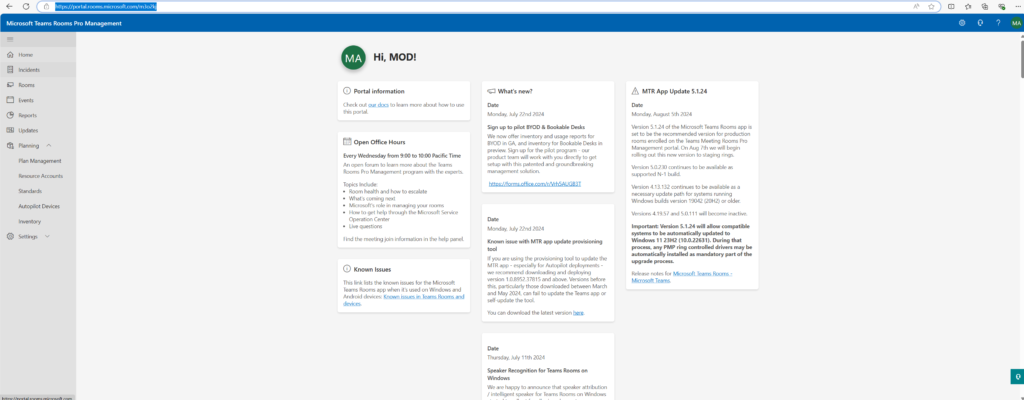
- You need access to the Microsoft Teams Pro Management Portal. You can access this via https://portal.rooms.microsoft.com as an appropriate Teams Admin and you can read much much more about Pro Management & the Pro Portal here: Microsoft Teams Rooms Pro management – Microsoft Teams | Microsoft Learn
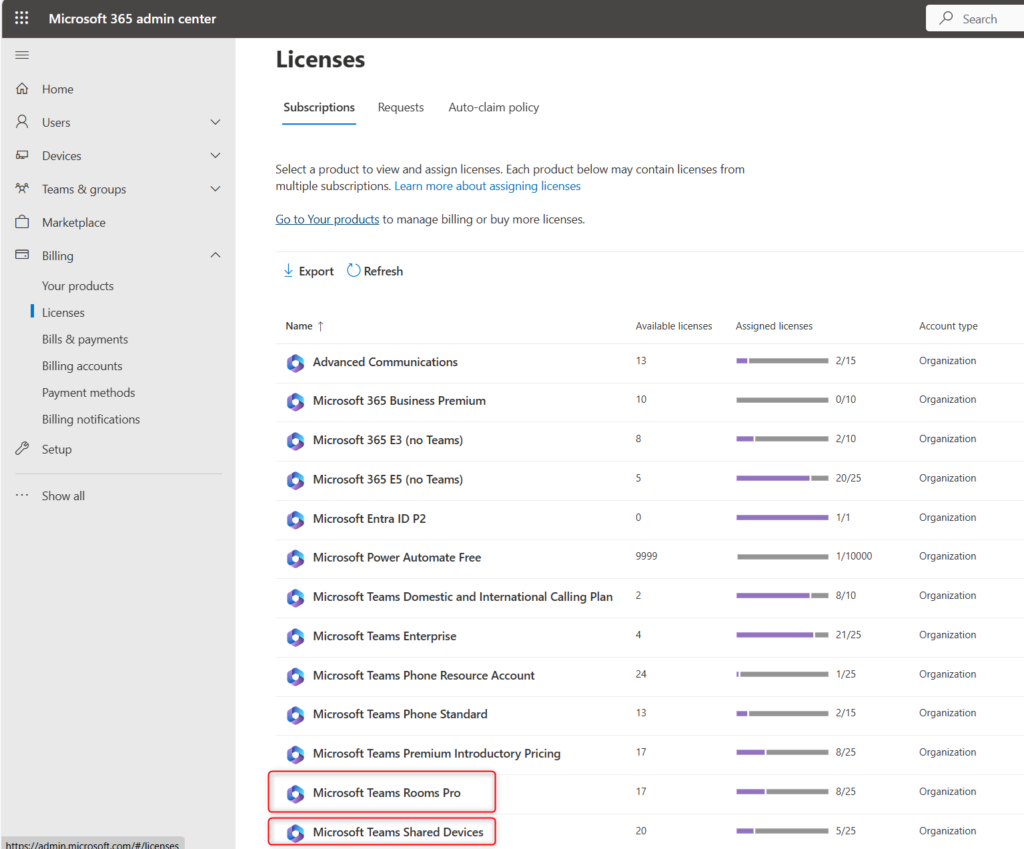
- You need at least one Teams Shared Device license or one Teams rooms pro license in your organization
- You need to create and setup the environment (duh! more on that soon)
- You’ll need to use the new version of Microsoft Teams desktop app on Windows or on a Mac
Pro Portal? Check!
Teams Rooms Pro or Shared Device Licenses? Check!
The rest of the pre-reqs come easy. More on those as we continue.
Step 2 – Create Desk Pool Accounts
Desk pool accounts are “slightly” different from Room accounts but still based on the Exchange workspace resource mailbox architecture. You can use a Desk Pool by reserving it multiple times by different users at the same time even – all the way up to capacity. Rooms can only be used once at a specific time. More on that page I linked to up top.
Here is the full documentation on how you create your Desk Pool account and how you could then use it in Outlook. I’ll step through the relevant parts from my lab. How to create and book a workspace – Exchange | Microsoft Learn
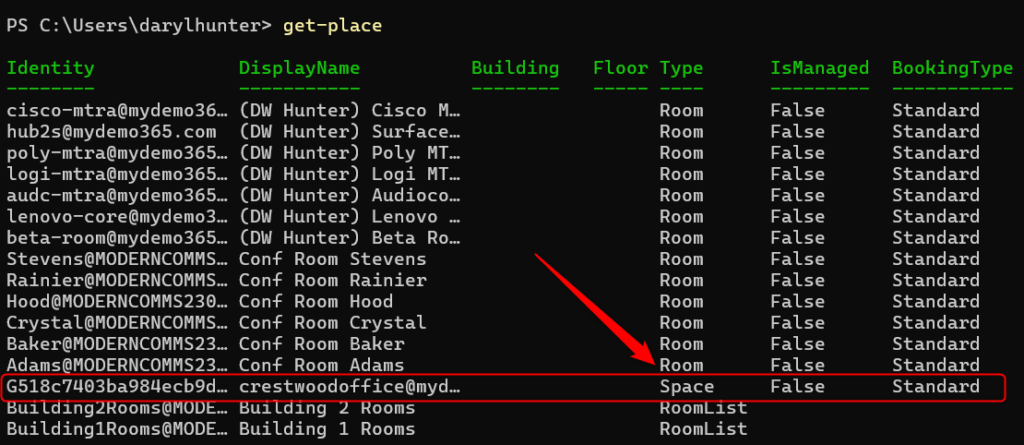
Let’s get started by creating a desk pool account. We’ll do this in Exchange Online Powershell. I’m going to call mine “crestwoodoffice” because I live and work in Crestwood Kentucky 🙂


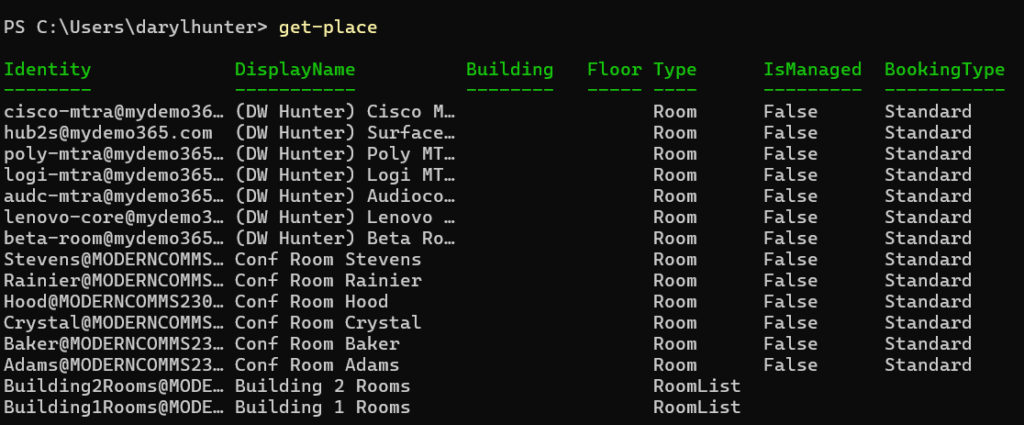
After creating, you’ll want to set a few important pieces of metadata using the set-place cmdlet. But, for some reason, this doesn’t show up in get-place. That’s strange.
Let’s look to see if we can find a clue. Yup. There it is. I should have read the notes!
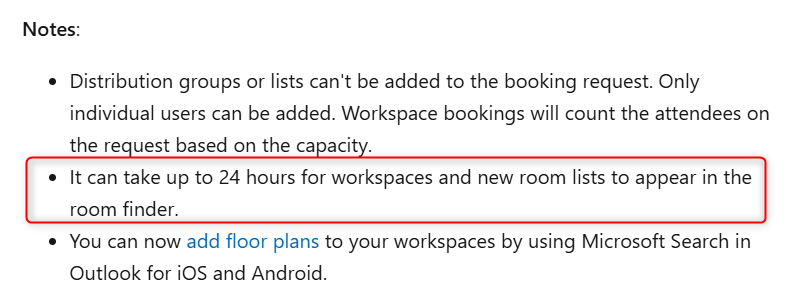
So, this process will take place over a few days, because, even though the “mailbox” exists, the actual details of that “Place” doesn’t appear to be managed in get-place / set-place cmdlets and also it doesn’t appear in the Pro Portal for future steps yet. Let’s pause here for a couple days.

Sweet! Somewhere between 24-48 hours later (time passes, I went to sleep, you know) I can now see the place. Back to the set-place cmdlet mentioned before. Let’s set the capacity (I’ll start with 8) and a country (United States for me).

Let’s make sure this appears in M365 Admin Center -> Resources -> Rooms & equipment. It does.

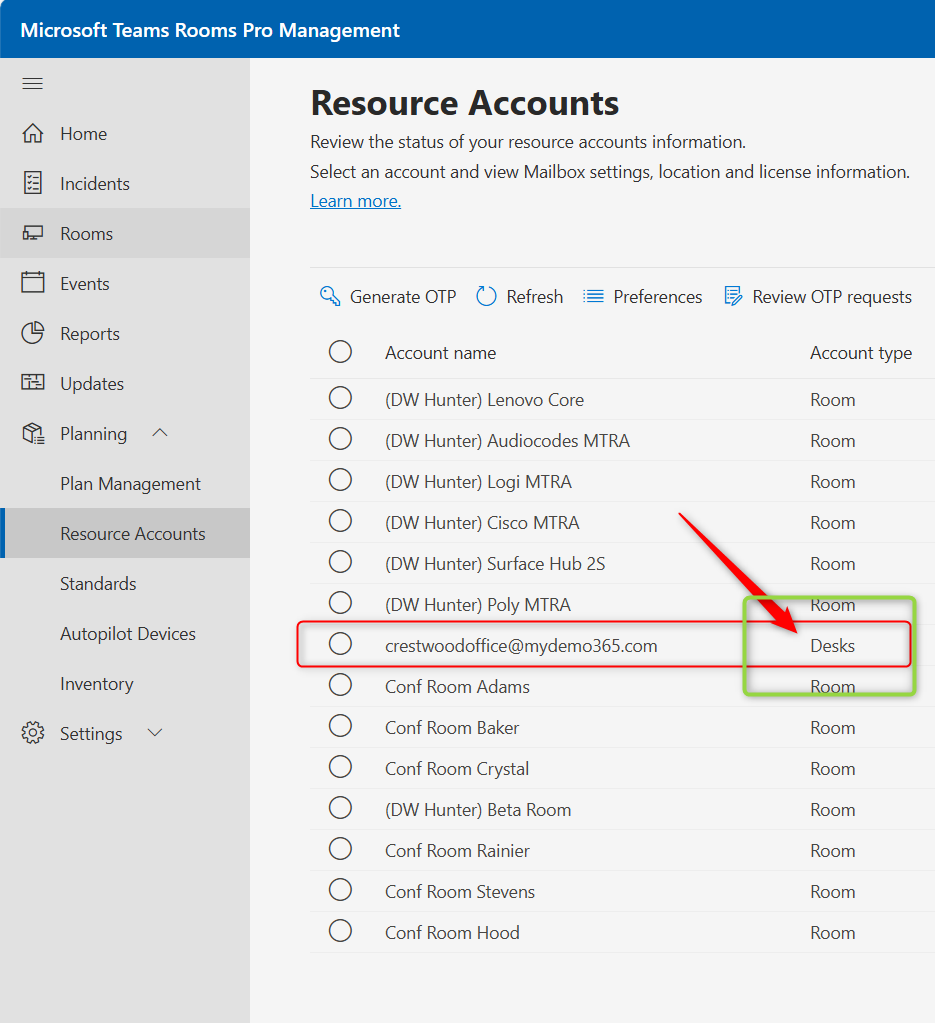
How about Pro Portal? Does this how up in Planning -> Resource Accounts? Yup. It does.
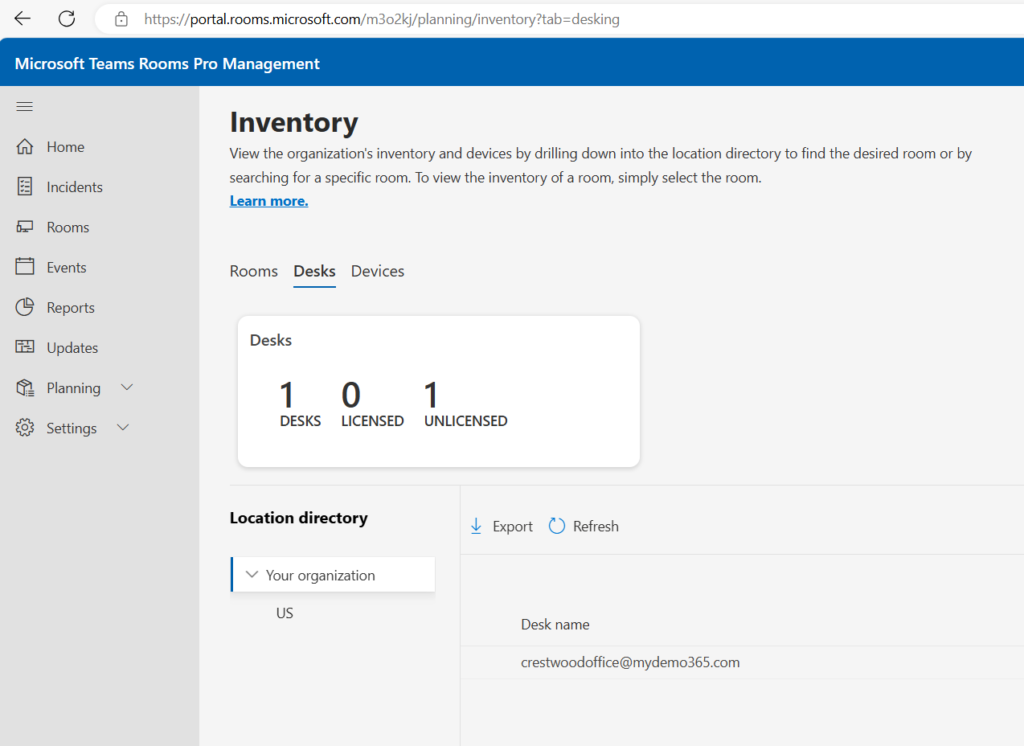
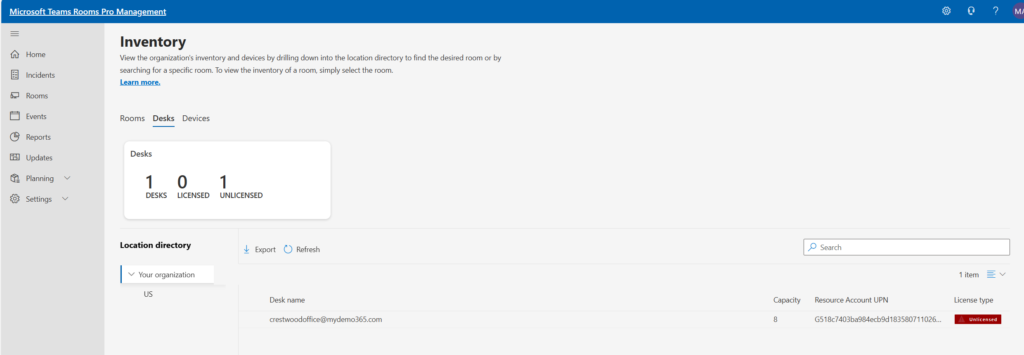
What about Pro Portal -> Planning -> Inventory -> Desks tab? Yup. It does there too!
Great. I think we’ve got this setup. Now what?
Step 3 – Collect information on peripheral devices on individual desks
This is where a lot of “meat” is put on the bone. If you picture a floor with many different “touch down desks” each containing peripherals like monitors, etc., that’s the picture of what we’re after here. We want to have our people reserve a “spot” and then when they plug in, we want to know that and update “all the things”(tm) Or even if they don’t reserve, they want to have an integrated experience on-demand. You may have a variety of Dell, or Lenovo, or HP monitors or other peripherals. How do you properly find them and then get them associated with a Bookable Desk? That’s this section.
***Warning: this is a long section. You may want a drink and a snack***
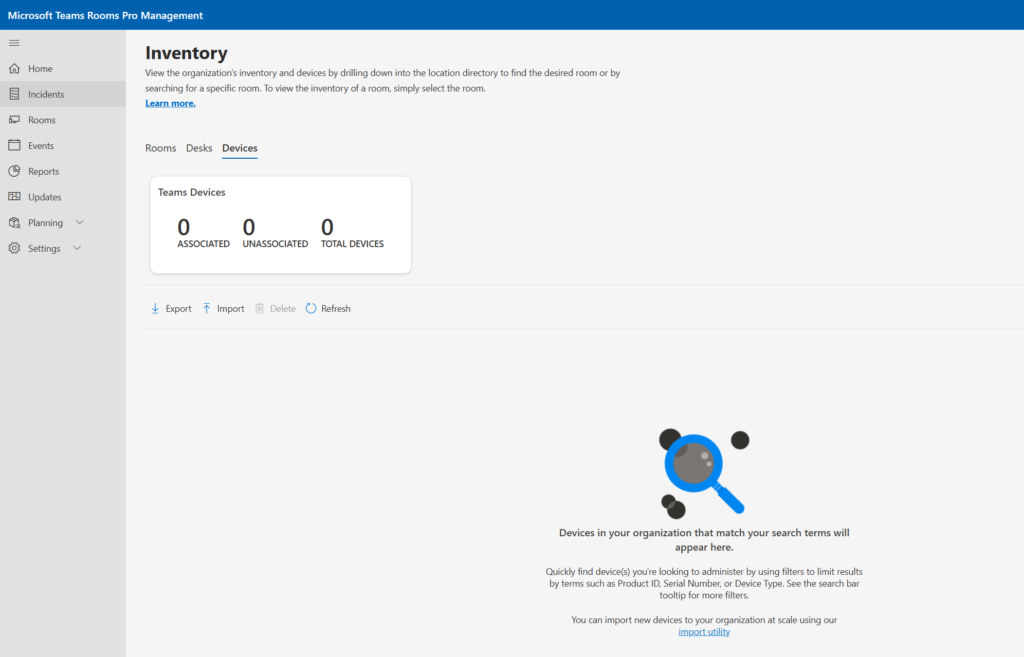
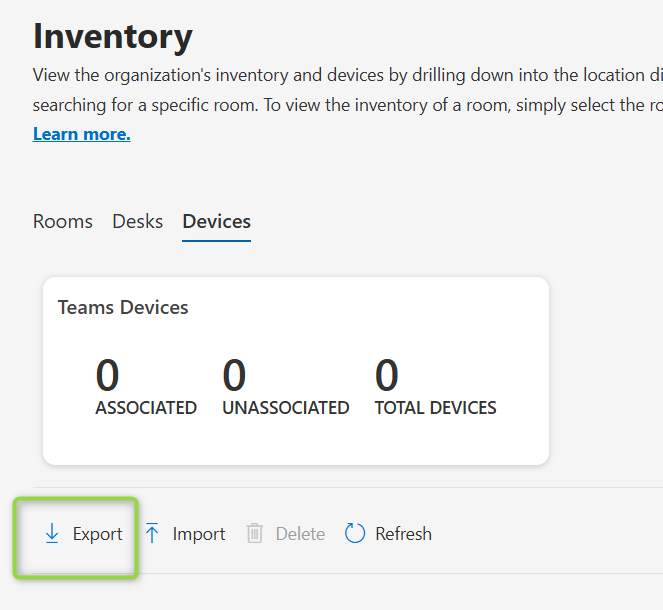
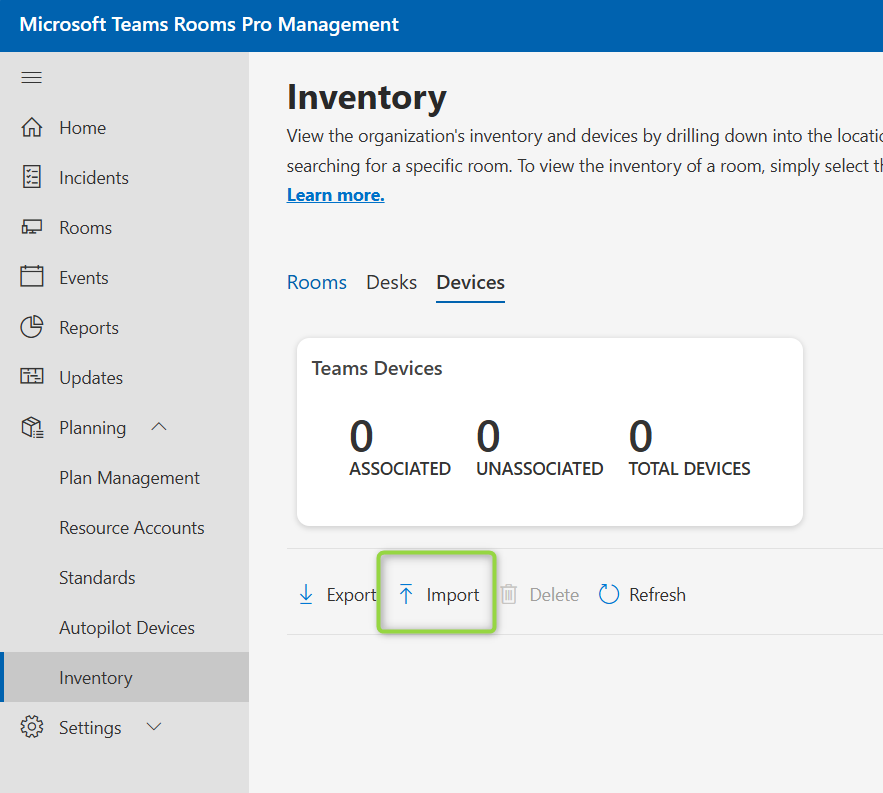
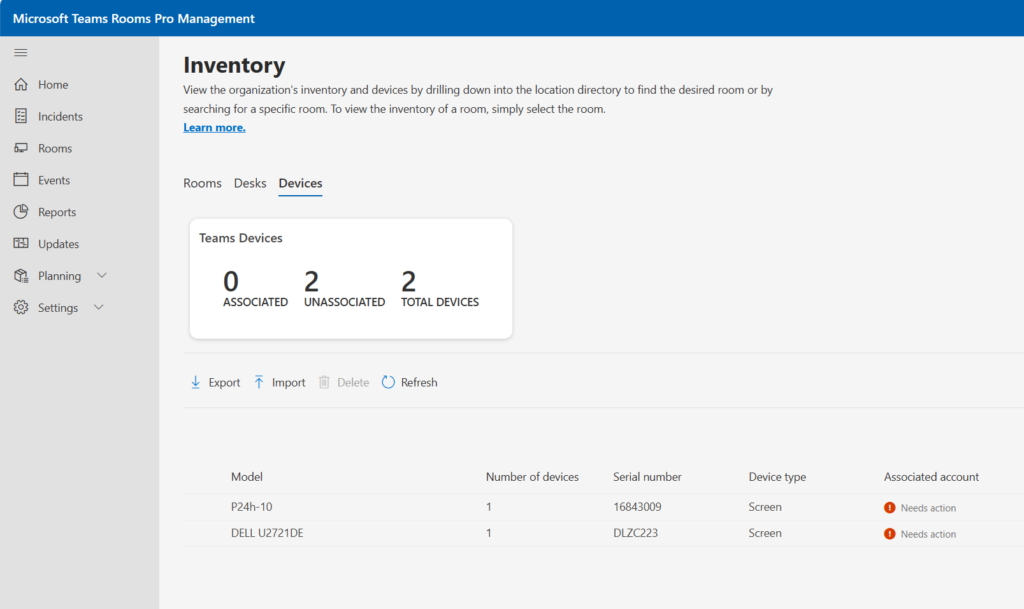
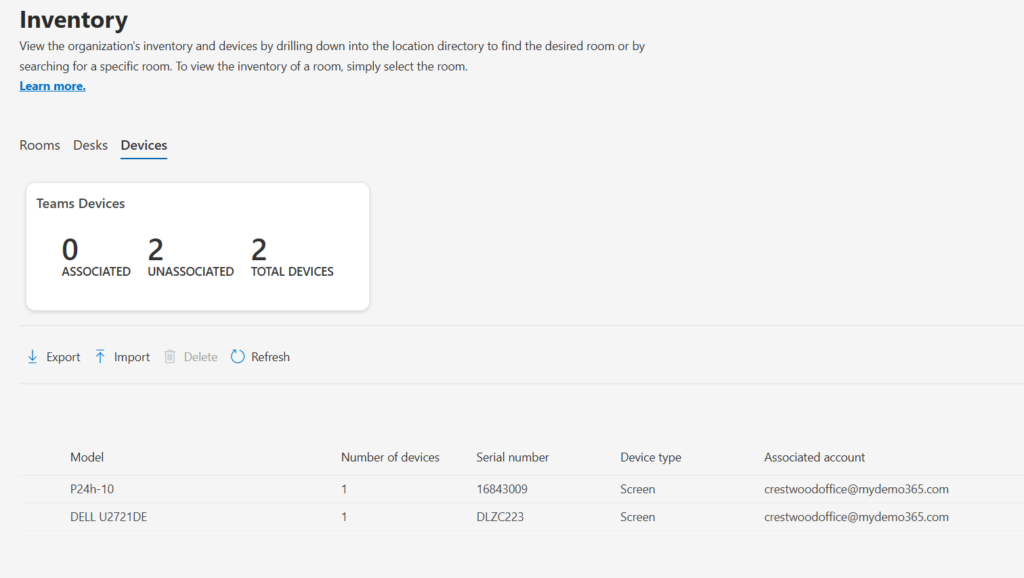
One way to do this task is automatically over time. Once 5 or more individual people plug into a peripheral device, it will automatically appear in the Pro Portal for you to do magic with. I don’t have 5 or more individuals in my lab. But if I did, those devices would appear under Pro Portal -> Planning -> Inventory -> Devices. But, none are there.
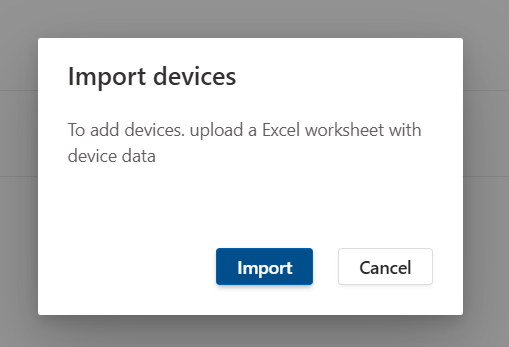
So, now what? Oh yeah, there is an “import utility” mentioned. Let’s figure that out! It will import a file. But in what format? Let’s click the “Export” button to get a blank one!
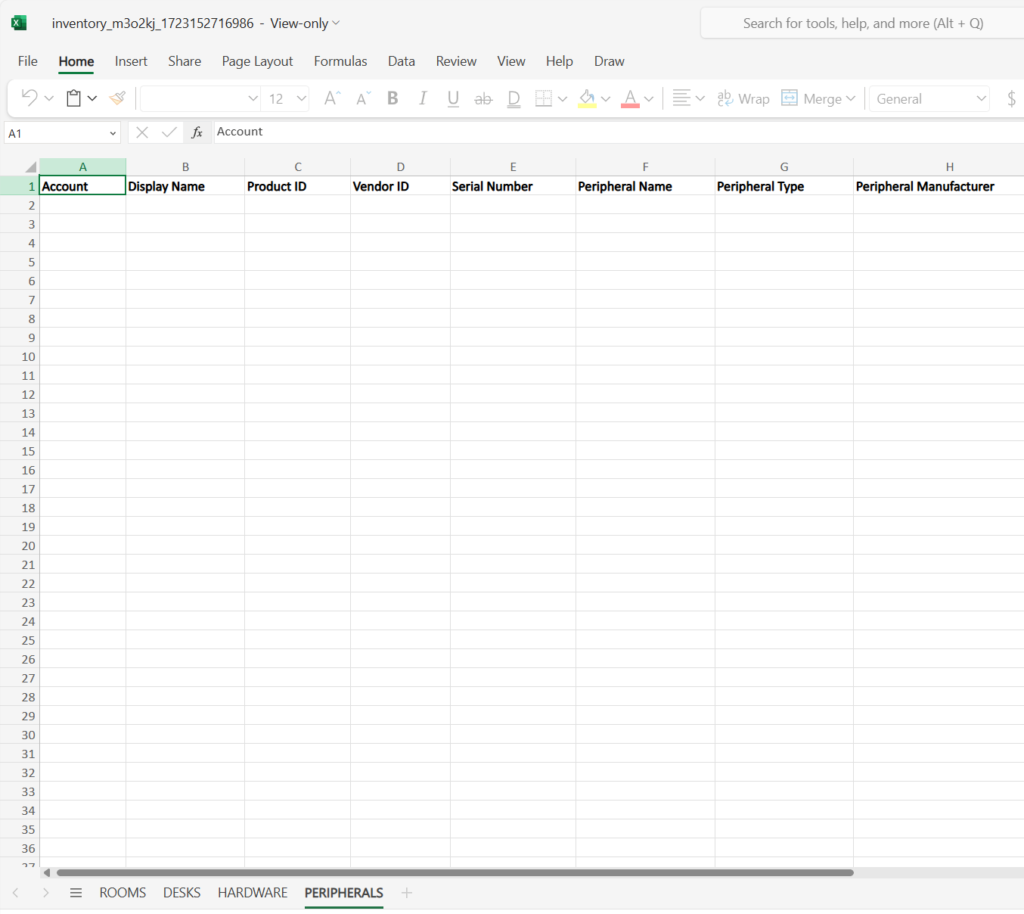
We get an XLSX with four tabs of Rooms, Desks, Hardware and Peripherals. This looks – um – complicated? Now what? Good news! Step 3 in our documentation points us to an automation script created to find those peripherals, put that information in a file, and then you can use that file to upload to Pro Portal! Sweet! Let’s read about that here Add peripherals to inventory – Microsoft Teams | Microsoft Learn
Take time to download and extract the ZIP file and get the .PS1 PowerShell script ready to go. You may need to unblock it. I usually put mine in a threaded directory on my c:\source folder. Let’s run it.
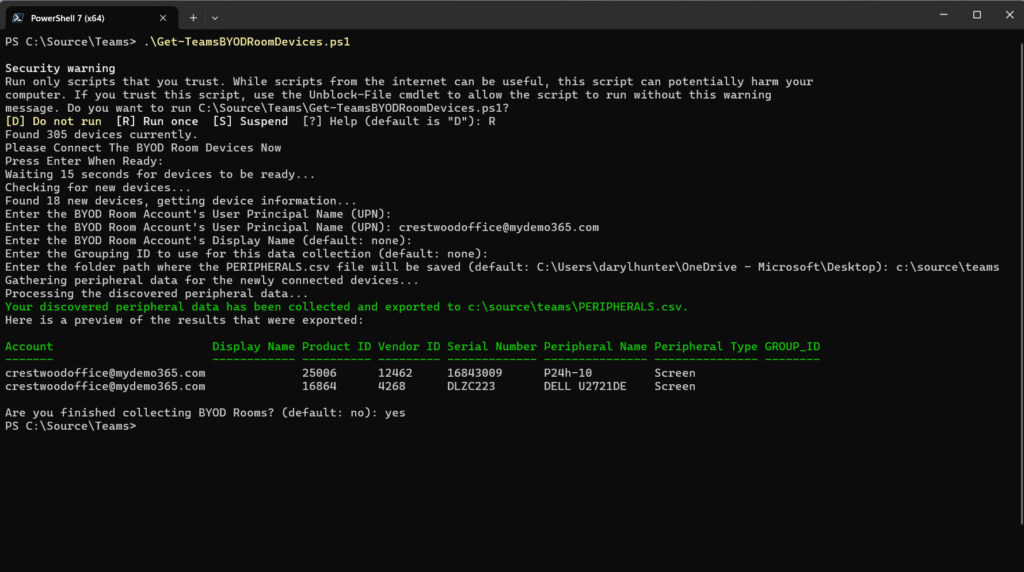
Here’s what happened:
- The script started
- It ran an inventory and paused to let me plug in new devices to discover
- I did – I plugged in a Dell 27″ monitor (via USB-C) and a Lenovo 24″ monitor (via HDMI)
- I hit enter. It paused to let things settle.
- The it found new devices.
- It asked me for some environmental details which I entered.
- It asked where to save the output – I chose the same c:\source\teams folder where I ran the script
- It built an output file and then displayed the details on screen – yup, there are my 2x monitors!
- Then we stopped
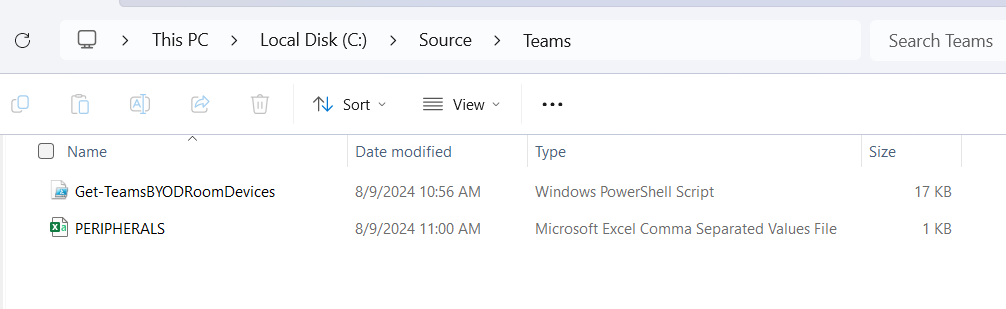
Let’s open the file and look at it. Remember, it’s in my folder I told the script about.
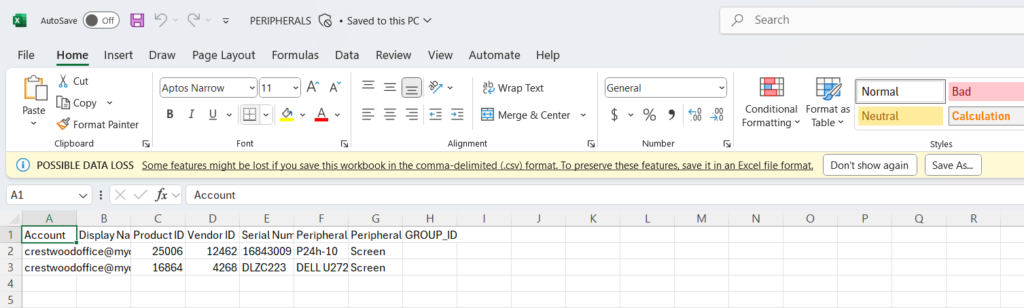
Notice this is a CSV file. If you read closely in the article above on how to gather these Peripherals, I need to save this CSV into XLSX (Excel) format. Why? Because that’s what Pro Portal expects. We generate a CSV and then we convert to XLSX. Let’s do that. Also that same article reminds us that the first sheet in the CSV must be titled PERIPHERALS. Good news, the script does that automatically for us.


Great. We have our peripherals. Let’s get them into Pro Portal -> Inventory -> Devices and import that XLSX file we created above!
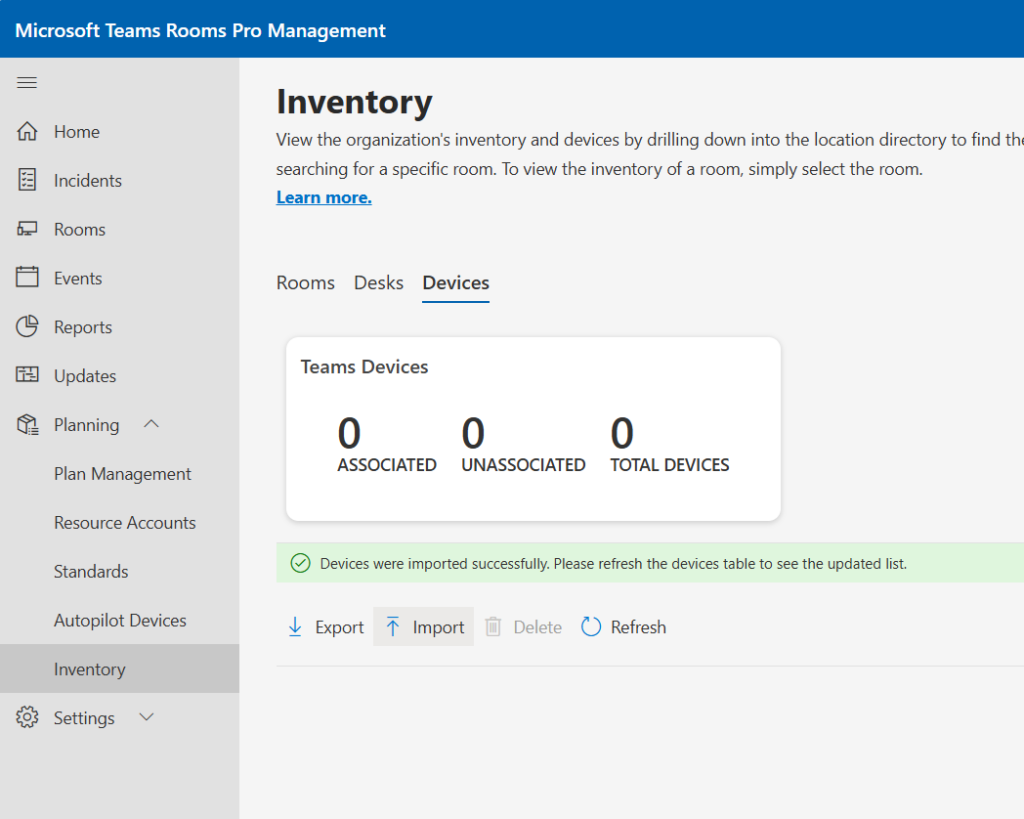
Okay, that’s good. Let’s refresh!
Time to associate these with our right Bookable Desk! Click on the P24h-10 (Lenovo) device.
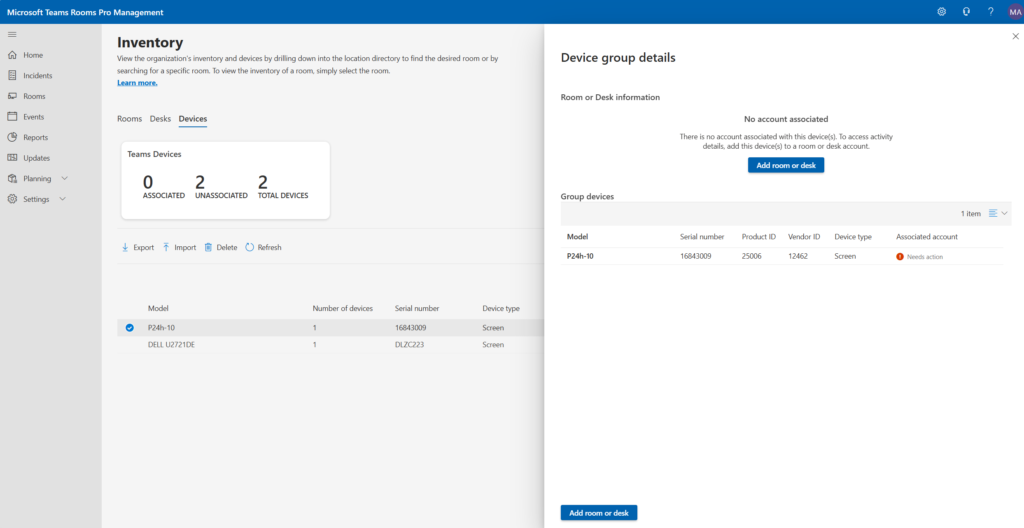
Click Add Room or desk and let’s get this associated with Crestwood Office!
Wait. Where’s Crestwood Office? Let’s search for it.
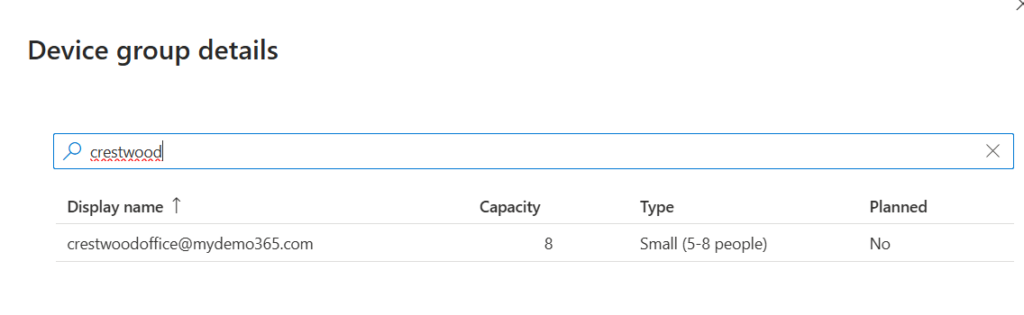
Strange. I can’t select it. Let’s try this another way. Back to Pro Portal -> Inventory -> Desks.
Click on Crestwood Office -> Inventory tab
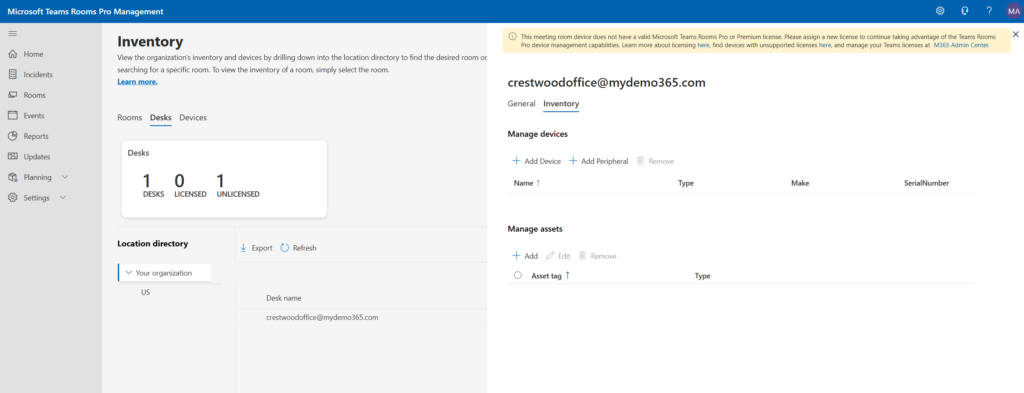
Let’s try to add these peripherals by clicking the – um – Add Peripheral button!
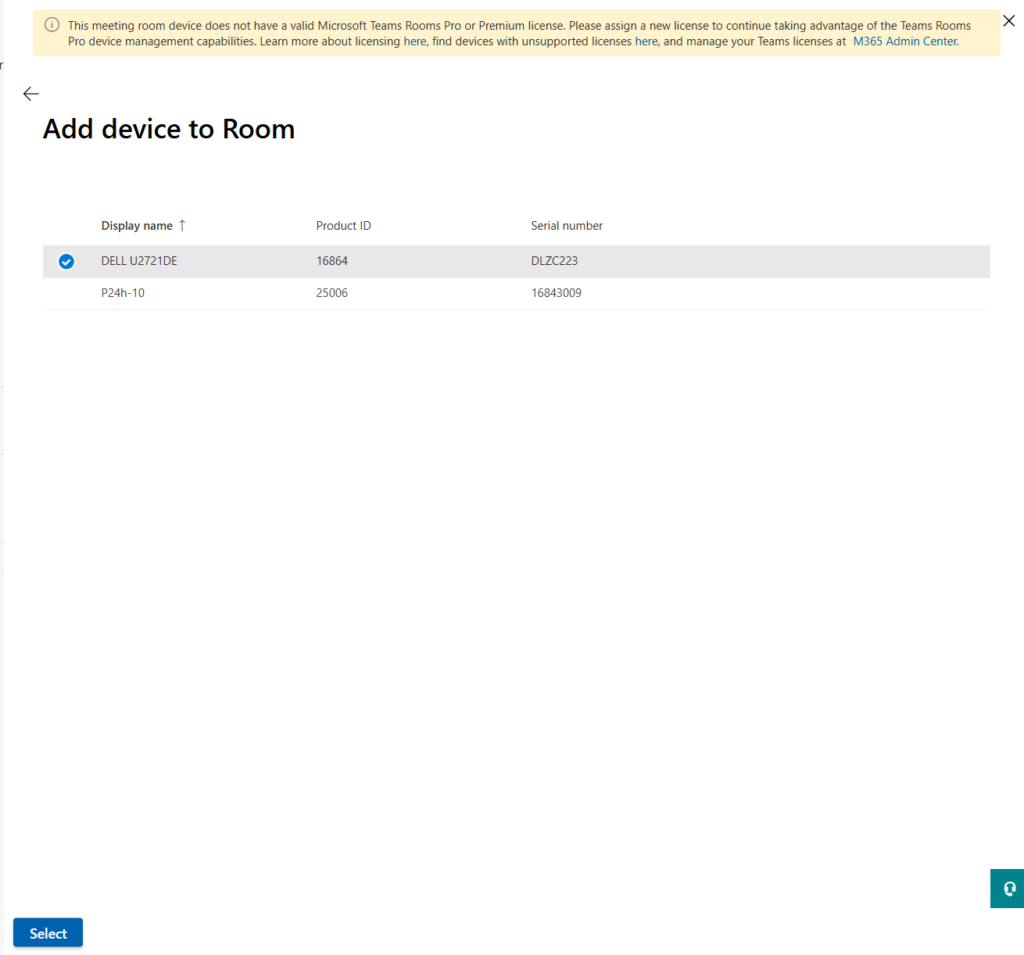
I choose the Dell. Hit Select.
Great. That works. Let’s add the Lenovo.
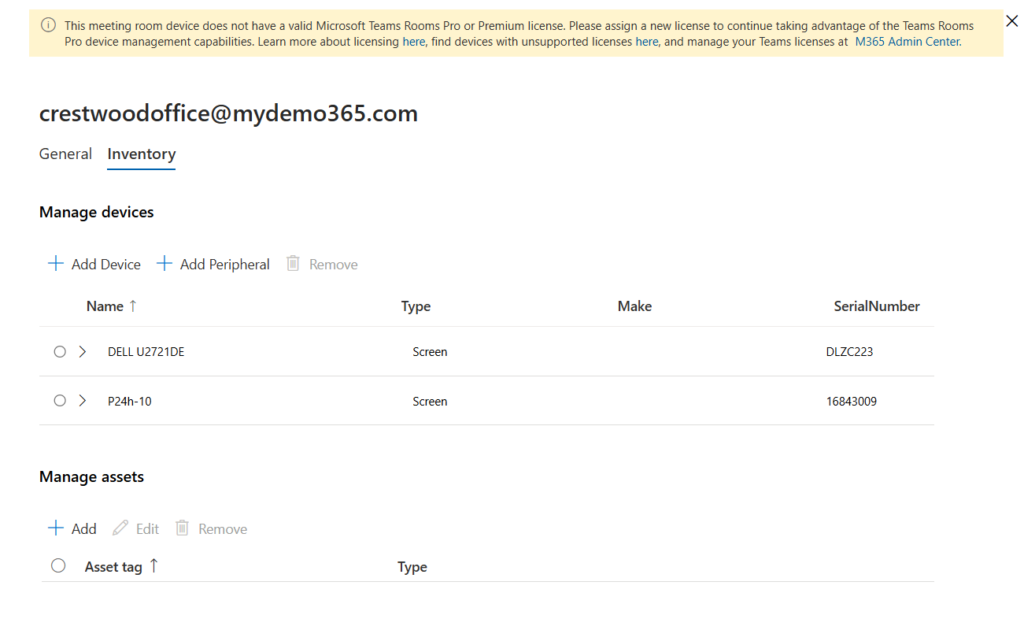
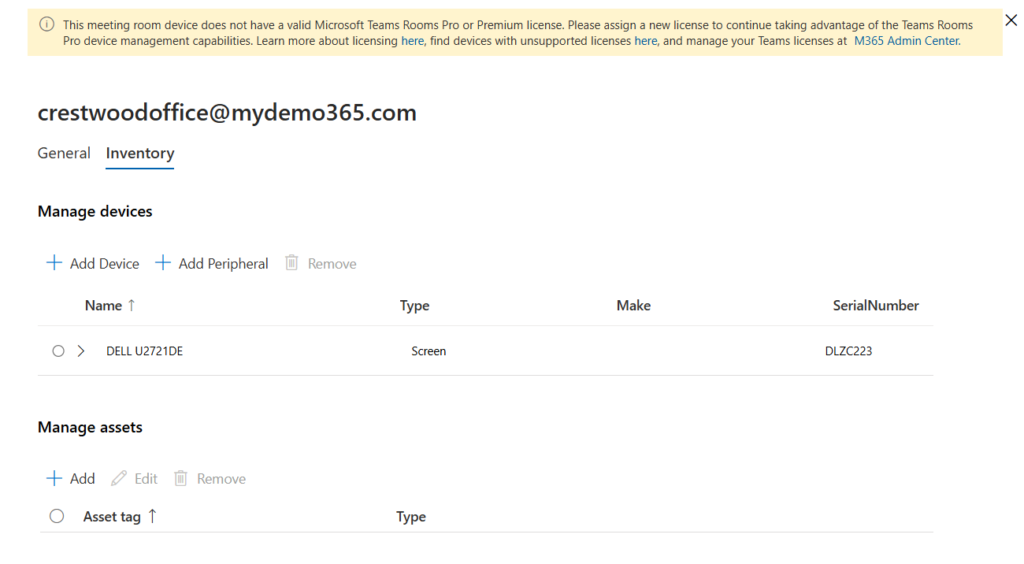
Done. I’m not sure at this time why we couldn’t add these from the “Devices” section and instead had to use the “Desks” section – but – if we navigate back to “Devices” we see the association is right.
Okay. We’ve got our peripherals, and we have them associated with our Bookable Desk. Let’s move on.
Step 4 – Test the end user experience
Let’s test the experience. We’ll start with the “on demand” experience – you just show up and plug in. Take a laptop and sign into the Teams Client. When you physically plug in the laptop – what is *supposed* to happen is that Teams talks with your configuration we just made and will “reserve” the Bookable Desk for you and you *should* see a notice in your Teams client and also a booking appearance on your Teams Calendar. Let’s do it. I’ll take my handy Macbook Pro and sign in as Patti.
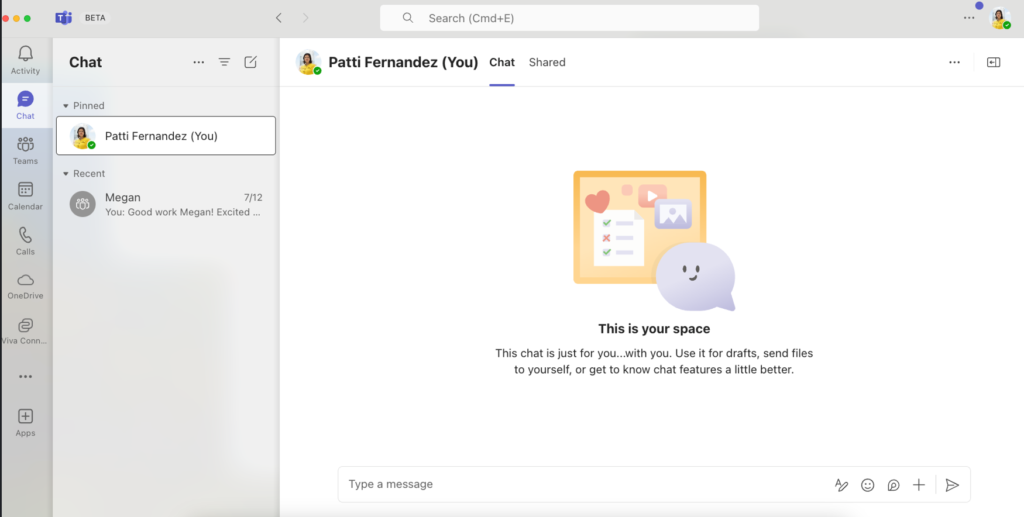
Now, let’s plug in one of those Peripherals – the Dell screen or the Lenovo screen. USB-C or HDMI either one is fine. I’ll pick the Dell in this case. After a few seconds, I get an Activity notice!

Let’s read that

Sweet! I’m now reserved (there was configuration in the articles I’ve posted about reservation durations, etc. I didn’t configure any of that – just defaults). What does my calendar show?

Nice.
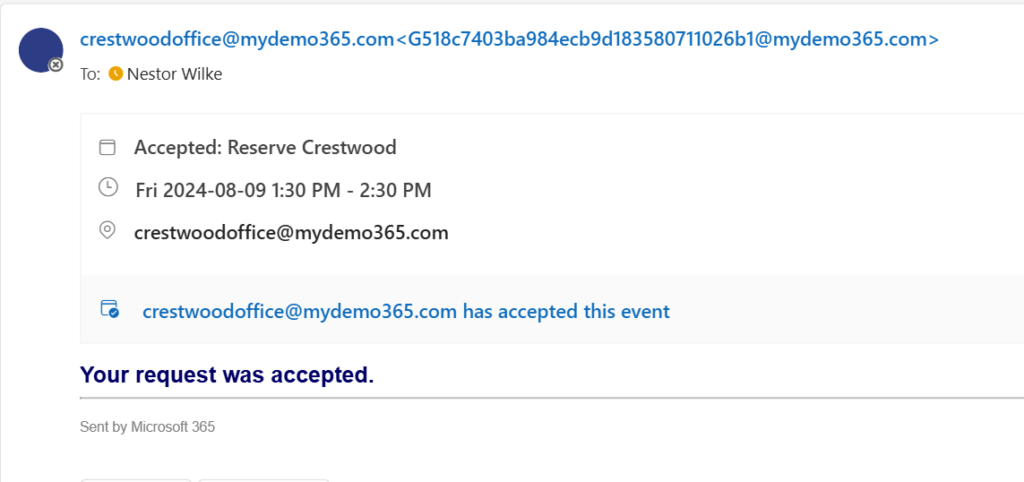
Now let’s test the “reservation” experience. We’re going to create a meeting in Outlook and invite the Bookable Desk and reserve it. Let’s do that as Nestor. I’ll reserve the Crestwood Office for an hour this afternoon from 1:30pm to 2:30pm.
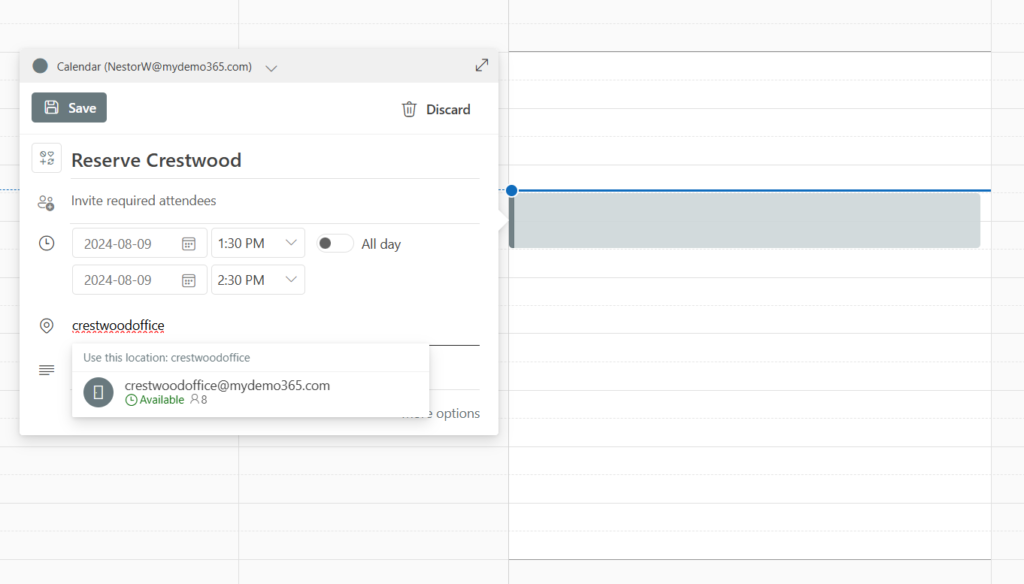
Notice when I searched for the Bookable Desk, it shows up as available and that the overall capacity is 8 people. That’s nice! Let’s save it and look at the Calendar. Great!

A few seconds later I get my confirmation email
Okay, now, I drive to the office (walk 3 feet). Teams Client is logged in.

Now I plug in my laptop. I’ll connect to the Lenovo Screen because – as you recall – Patti is already sitting down plugged into the Dell Screen. This is good. Remember, our Bookable Desk (Crestwood Office) has a capacity of 8. This is only 2! 🙂 A few seconds later, just like before, Activity gets an update!
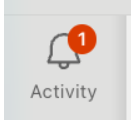
Let’s look at it

Notice it’s a little different! Before, with Patti, it said “This space is reserved and ready for you” but that was the on-demand or “walk up” experience.
Since Nestor booked this ahead of time, the “arrival notification” experience checks him in and says “You’re all set for this reservation” confirms my reservation time until 2:30pm (just like was scheduled in Outlook) and then as before brings up the calendar item itself for review.
Let’s Wrap This Up
Whew! That was a lot of pictures! Just in case you’d like the “one spot” to go, here are the articles mentioned in this blog article.
- Setting up Bookable Desks in Microsoft Teams – Microsoft Teams | Microsoft Learn
- How to create and book a workspace – Exchange | Microsoft Learn
- Set-Place (ExchangePowerShell) | Microsoft Learn
- Add peripherals to inventory – Microsoft Teams | Microsoft Learn
What do you think? Bookable Desks is a great way to either reserve, or use – on-demand – a configured space simply by plugging in. It’s all connected via Teams, Exchange, and other M365 services in the background. I can see some great future usage and reporting of this to help customers!